
Have No Fear, Your Balloon Bestie is Here!
So you bought the box, the party is here, and it’s time to get to work. Scroll down for allll the instructions you’ll need to make your party pop! If you have any questions, shoot us an email!
STEP 1: Follow Assembly Video Instructions HERE!
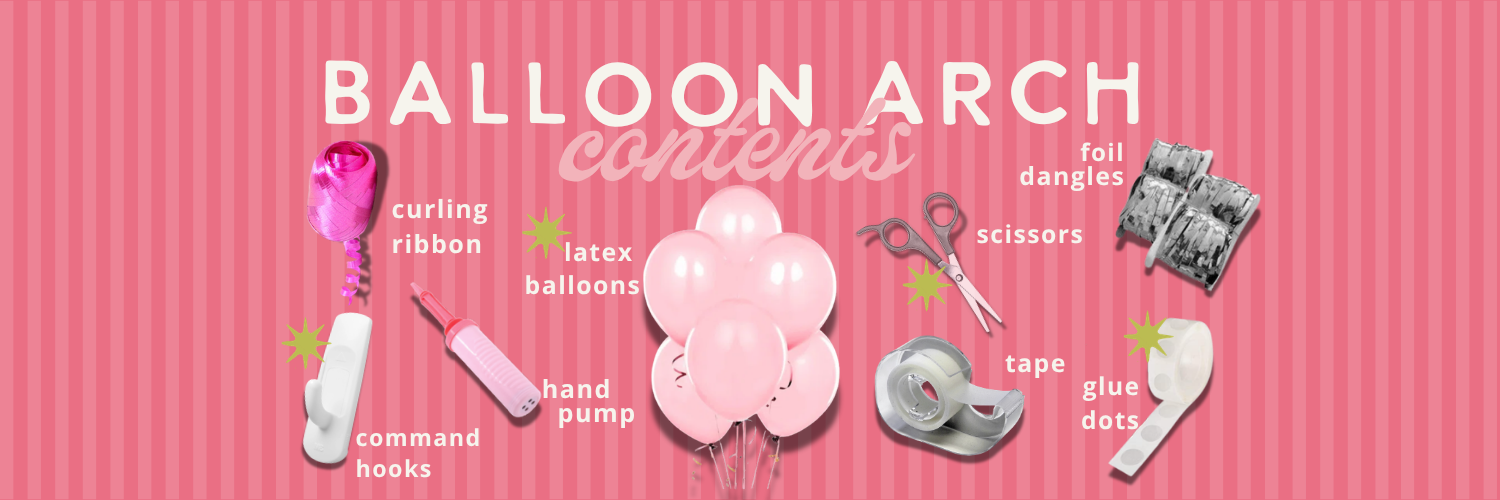
SIDE NOTE: A balloon pump isn’t essential to creating a balloon arch, but it is recommended to speed up the process and make it a lot easier. Here’s a link to one we highly recommend! If not, our trusty hand pump will do and your arm muscles will be poppin’ for pics (silver lining ladies). Blow up and tie all of the balloons and set aside. Try to inflate the balloons in a round shape rather than an oval shape. We also recommend blowing up 10/12 small 5” balloons to use later in the arch.
STEP 2: Hang Command Hooks!
Remove the sticky part off the command hooks and attach the correct side to the plastic hook (make sure to read which side is for the wall!), leave about half an inch hanging off the bottom of the hook in order to safely remove.
Place one command hook on each corner of the wall where you want your balloon garland to end. Press firmly in to ensure this will stay! Decide which side will be the long (droopy) side and which will be the end!
STEP 3: Hang Foil Dangles!
Look, we have no clue what these are actually called, but we named them dangles, so they’re ~dangles~. Unwrap your dangles carefully to ensure they don’t get tangled, remove the sticky strip, then hang the dangles on the wall and press it down. You’ll want them in line or a tiny bit under where you put the command hook so that the top of the dangles is under the balloons. Hang both so they are perfectly centered in the area you want the balloon arch to go.
STEP 4: Hang the Balloon Arch!
Beware, this is the hardest part! With the balloon garland laid out flat in front of you, identify which side you would like to be at the top and which side you would like to curve. Cut about 12” of string, loop it around the garland around a foot down the garland on the end that is ‘the top’. Tie a knot ensuring that it is securely around the tape in between the balloons – creating a hanging loop. You will now take the loop you’ve created and hang it on one command hook, creating the top of the balloon arch.
You will then stretch the top of the arch across the middle, to the other command hook and use another piece of string to create that same loop and put it around the second command hook. If they are too loose, re-tie the knots until they are correct. Be careful about making the arch too tight as it can pull down the command hooks! Since the balloons are filled with air and not helium they will settle into position and create a beautiful archway.
STEP 5: Add In Smallies!
Again, another name we made up, but the small 5” balloons you blew up super tiny are called ~smallies~. Once your balloon arch is hung, fill in any gaps with these smallies and use rubber bands to attach the smalls to each cluster like mentioned in the video!
STEP 6: Blow Up Foil Balloons!
Blowing up the foil balloons, oh what fun! CAUTION: THESE BALLOONS ARE MORE FRAGILE THAN YOUR 90 YEAR OLD GRANDMOTHER SO USE CAUTION :’)
When blowing up foil balloons, whether it is the BRIDE balloons or extra balloons that go with your theme, we recommend blowing them up with a straw and your mouth. You will gently place the straw into the hole and wiggle it until you’re able to blow into the straw and feel air going into the balloon. Blow until you are happy with the size, place a piece of tape directly over the hole (be meticulous about this so air doesn’t seep out), then tape the tab back on the balloon so you can’t see it. If you feel like your arch just needs a little extra UMPH, you can totally put a foil balloon on the arch with your glue dots, if not, they make for fun props for photos and additional decor on couches, beds, etc.
For the BRIDE balloons, be extra careful with these. When blowing up the “E”, you may need to gently massage the middle to ensure it opens up. We don’t want any pops at this party! Once you have all the letters blown up, string them with the curling ribbon and tape them up wherever you want them to go!
STEP 7: All The Fun Extras!
Everything else is totally up to you and your creative eye! Each box comes with extras that can be placed all over the Airbnb! For confetti, sprinkle that ‘ish everywhere like the confetti fairy! We recommend blowing up all the extra balloons and sprinkling them in the bride’s room and in the common areas.
STEP 8: Pop Champagne & Do The Dang Thang!
Your party should now be totally insta-worthy and ready to pop champagne! Invite your bride back from the bar you’ve been hiding her away at, take some cute pics, tag us on insta @bach_babes and…ENJOY YOUR PARTY!


